12 octubre, 2023
How To Remove Gel Polish Safely: A Guide For Nail Technicians
We know that improper gel removal can spell disaster for our client's nails. So, how do we ensure that the removal is as flawless as the application? Dive into this guide as we unravel the dos and don’ts, ensuring that your client's nails remain healthy, undamaged, and ready for their next show-stopping set!
Note: If you’d rather see the removal process in action you can watch our PureBuild Removal Video Tutorial1. Gather Your Tools
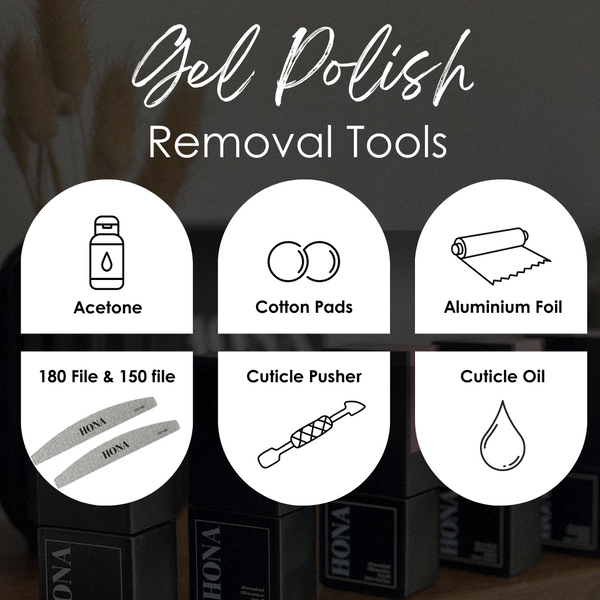
Before you begin, ensure you have all the necessary tools at your disposal:- 100% Pure Acetone
- Cotton Balls or Pads
- Aluminium Foil (cut into small squares, or you can buy pre-made foil wraps)
- A 180 Nail File for gel polish removal
- A 150 Nail File for builder gel removal
- Orangewood Stick or Cuticle Pusher
- Cuticle oil

2. Preparation
3. Filing The Shiny Surface
- Use a 180 file for a gel manicure or a 150 for builder gel and file over the gel on the client's nail. This will break the seal. The goal is to file away the shine for a gel manicure and file away the bulk for a PureBuild manicure. Make sure to cover the cuticle area with your finger to protect the delicate skin.
4. Wrap Nails
- Fully saturate cotton balls or pads in acetone-based nail polish remover.
- Once you are satisfied with the filing, place an acetone-soaked cotton pad on the nail and wrap the foil around the nail - Repeat on all of the nails and soak for around 10-15 mins.
5. Gently Push Off the Gel
- After soaking, use an orange wood stick or cuticle pusher to gently push off the gel polish. Start from the base and move to the tip.
6. Clean and Hydrate
- Once all the gel polish is removed, wash the hands with mild soap and warm water to remove any residual acetone. Finish the process by applying cuticle oil to nourish the nails and surrounding skin. Or, skip this step and begin the prep for a new set.


